Turn Your G1000s Into a Cockpit the Easy Way With Flight Velocity Pro

Steve | G-LOC MEDIA
Flight simulation enthusiast and YouTuber
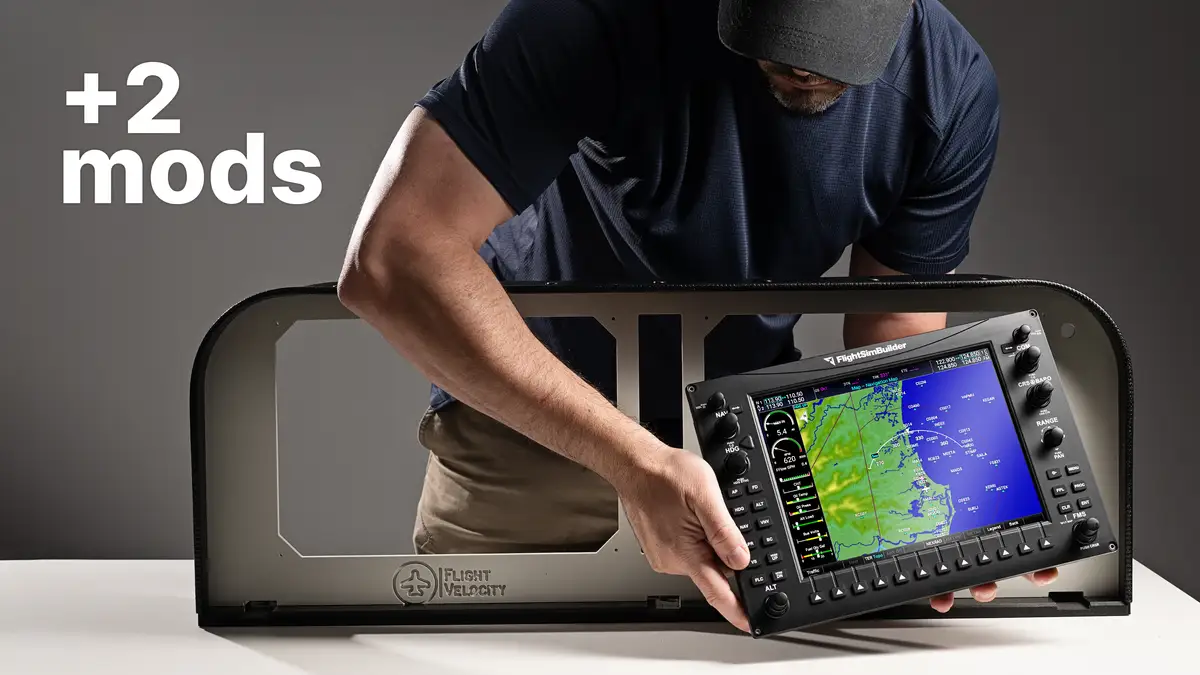
The FlightSimBuilder Velocity Pro 6 UDM is a $360 panel-mounted housing for the G1000 TNXi suite and audio panel, aimed at simmers who want an integrated avionics panel without the DIY route. In this hands-on review I cover build quality, mounting, two simple mods, and the HDMI-to-USB trick for running multiple screens.
Pros
- Excellent finish and build quality for the price
- Panel is solid once the avionics are locked in
- Grey or black colour options
- Simple, pre-cut holes for easy lighting mods
Cons
- Designed primarily for the Honeycomb bracket mount, which may not suit everyone
- No included cable management or lighting
- GA aircraft only
FlightSimBuilder Velocity Pro 6 UDM Review: The Easy Way to a Panel-Mounted G1000 Setup
There’s something about combining your avionics into a single panel that just makes a flight sim setup feel more connected, more substantial, more like a real aircraft. You’ve got two ways to get there. You can go the full DIY route and build one yourself for about $100 in hardware store parts, which I’ve done, and genuinely recommend if that’s your kind of thing. Or you can skip the sawdust and buy something that works out of the box with a proper finish.
This review is for everyone in the second camp. The FlightSimBuilder Velocity Pro 6 UDM comes in at $360, it’s designed to pair with the Honeycomb Alpha yoke and Bravo throttle via an under-mount bracket, and it houses the FlightSimBuilder G1000 TNXi suite along with the audio panel. FlightSimBuilder sent this through to help with the video review, and the rest of the gear is from older review videos on the channel.
I’ll walk through the build quality, two simple mods that make a real difference, how I’ve mounted it on my setup, and the HDMI-to-USB trick that lets you run multiple screens plus the G1000 panels without running out of ports on your graphics card.
Who the Velocity Pro 6 UDM is actually for
Before we get into the detail, let me be straight about this. If you’re already thinking “I could build this myself for a hundred bucks,” you’re right, you absolutely could, and you should. The DIY route is genuinely rewarding.
This panel is for the simmer who wants a proper panel-mounted G1000 setup without the measuring, cutting, sanding and multiple hardware store trips. The finish you get here is the entire point of the $360 price tag, so build quality is the first thing worth looking at.
Build quality and first impressions
The panel comes in two colours, black and grey. I’ve got the grey one here.
The front face is a 5 to 6mm rigid, ABS plastic, but it looks laser cut because the edges are extremely precise and well finished. The glare shield on top is a 3mm ABS plastic piece, screwed down around the whole top edge. The rear base platform is just under 12mm thick with triangular support brackets on the back.
There’s one honest observation worth noting. Before you lock the avionics into the panel, you’ll feel a little flex in some sections. The good news is that once the G1000 units are mounted and bolted down, that flex disappears completely. It’s a non-issue in use.
The bottom of the unit is flush with nothing attached. That’s intentional — it’s designed to clamp down via the Honeycomb under-mount bracket, which slots in through pre-cut points on the base. If you’re not running Honeycomb gear, you’ll either need to Velcro it down or sort an alternative mount. More on that shortly.
Mounting the Velocity Pro 6 UDM without the Honeycomb bracket
I’m not using the Honeycomb Alpha yoke, so I needed another way to mount this. My plan going in was to Velcro it to the desk, and to my genuine surprise, I didn’t end up needing to.
With all the G1000 units installed and locked in, the panel sits heavy enough that pressing any of the buttons doesn’t move it around. I can lift it off and put it back down easily, no permanent mount required. For most desk setups, if you’ve got the full G1000 TNXi suite inside, the weight does the job for you.
If you do want a more secure mount, Velcro or 3M strips on the underside of that back platform will lock it to the desk without any permanent modification.
Mod 1: Adding glare shield lighting
This is the first of two mods that take the panel from good to great, and both are simple.
I added a mains-powered LED strip light inside the glare shield. It has a remote that can turn it on and off, change the colour tone, and adjust the brightness. The strip plugs into mains power through the small pre-cut cable hole on the back of the glare shield, which I had to widen slightly to get the cable through cleanly.
For the adhesive, don’t use the strip’s included glue backing. In my experience, those never hold properly over time. I used 3M double-sided gel tape, which is what I’d recommend. Pull the cable through, apply the tape, line the strip up centrally, and stick it down to the inside face of the glare shield.
When you power it on, the light fills the panel beautifully. But there’s an issue you’ll immediately spot — the strip beams directly out at your face, which is distracting at best and unusable at worst.
That’s where the second mod comes in.
Mod 2: Hiding the LED strip with rubber trim
To cover the LED strip and stop it beaming out at you, I used a rubber car door seal picked up from Amazon. It presses onto the lip of the glare shield and sits in front of the LED strip, hiding the light source while still letting the glow fall onto the panel below.
One honest observation. The rubber I used was slightly too thick, and it folded in on itself slightly at both ends of the shield. I didn’t correct it for the video, but I will swap it for a thinner rubber at some point. If you’re planning this mod, go slightly thinner than what you think you need. That folding issue is avoidable with the right material.
Even with the fold, the result looks good and the light output is now exactly where it should be — on the panel, not in your eyes.
The HDMI-to-USB setup for running multiple screens
This is one of the most common questions I get, so it’s worth pulling out as its own section. If you’re running triple monitors plus two G1000 displays, that’s five screens. Most graphics cards don’t have five output ports, especially if you’re already using DisplayPort for your main monitors.
The solution is a product called the Plugable UD-ULTC4K. It’s a dual HDMI-to-USB adapter that takes both G1000 displays and routes them through a single USB connection. I run both HDMIs into the Plugable adapter, then that into a USB hub, and both G1000 panels show up as additional displays.
The honest trade-off is that you get some display compression artefacts, because the signal is being converted to USB rather than running native HDMI. In practice, I don’t care about it. For avionics displays specifically, where you’re reading instruments rather than looking at scenery, the compression is a non-issue. The sheer convenience of this setup makes it worth it.
Flying with the panel
Once it’s all mounted and wired, the Velocity Pro 6 UDM delivers exactly what you buy a panel like this for. It groups your avionics into a single tactile unit, removes the floating-screen look of running the G1000s loose on your desk, and makes the whole setup feel like a proper aircraft.
Honest trade-off worth naming. Running a G1000 panel like this does narrow the type of aircraft you’d realistically fly. You’re locked into GA aircraft that use the G1000, which means Cessnas, the SR22, Bonanzas, that kind of thing. But the more you narrow the landscape, the more immersive it actually gets. For most simmers who find the aircraft they love and fly it most of the time, that’s a feature not a flaw.
Who should buy the Velocity Pro 6 UDM
If you want a proper panel-mounted G1000 setup, you don’t want to go the DIY route, and you’ve already decided the FlightSimBuilder G1000 TNXi suite is the direction you’re going in, this is a sensible entry point into the category at $360. It gets you a finished panel with glare shield, cutouts for the full G1000 setup, and enough rigidity once installed to feel genuinely built-in rather than bolted together.
If you’d rather save the money and build one yourself, go for it. You’ll get a hundred-dollar version that works just as well, you’ll learn a lot, and you’ll have a story to tell. This panel is specifically for the simmer who values finish and convenience over the DIY journey.
Frequently Asked Questions
Affiliate Disclosure: Some links on this page are affiliate links. If you click and make a purchase, I may earn a small commission at no extra cost to you. I only recommend products I personally believe in.